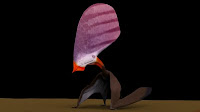
Alas the time has arrived! Sorry it's been a while since I've posted on this guy. I think the difference between the last image posted and this finished animation will speak for itself!
I also decided to do this making-of video. Houdini's procedural nature allowed me to show off some of this process really easily, so I took the time to edit this together:
I hope you enjoy! I really had a lot of fun delving into Pterosaur anatomy. Unfortunately due to time and other obligations at work, I cut the shot in half. The second half would have showed some quadrupedal walking and launching. The motion is all blocked out, but that's where it must remain for now (sigh). I hope sometime in the future I get the chance to revisit it. I really want to play with such a bizarre animal walking. Despite the cut, I'm really excited about the project! Thanks for tuning in!
-Evan

Wednesday, September 21, 2011

Tuesday, August 30, 2011
I got my very own SOP!
No new work in progress updates today. This is just something nice that happened at work. To give you some background, the last few months we had a couple of students from Nanyang Polytechnic in Singapore doing projects with an industry mentor here at Side Effects. A bunch of us at work helped them answer questions when they ran into problems during their productions. They leave tonight to go back home, and one of them made thank you cards for everyone. It was really nice, and what was even cooler, was that he went all out and designed/printed the cards himself! They consisted of Houdini nodes with our names on them, along with a personal thank you message written inside. So with that, I introduce you my vary own node, the Evan SOP:

I have no idea what it does, but it looks like it takes 8 inputs to work. I'm keeping this on my desk because it is awesome. Thanks JB!
-Evan

I have no idea what it does, but it looks like it takes 8 inputs to work. I'm keeping this on my desk because it is awesome. Thanks JB!
-Evan
Friday, August 26, 2011
Tupandactylus V
Just a quick post. Been working on grooming the pycnofibers and lighting/rendering/shading. Here is a test composite:

Things to continue to fix:
tweak lighting of the fur
adjust the ground texture
I'll probably add a matte painting to add to the environment as well.
But first I need to jump back into finishing the motion.
It's getting there...
-Evan

(as always, click for larger view)
Things to continue to fix:
tweak lighting of the fur
adjust the ground texture
I'll probably add a matte painting to add to the environment as well.
But first I need to jump back into finishing the motion.
It's getting there...
-Evan
Friday, August 12, 2011
Tupandactylus IV
I spent the past week taking the time to paint and sculpt the Tupandactylus model. I initially started by trying out 3D-Coat thanks to a recommendation I received. I painted the diffuse color map in 3D-Coat, and there is a lot about the program that I really like a lot. It's very easy to pick up, and there are a lot of nice tools. When it came to sculpting, I had so much trouble getting it to properly export a displacement map. It was also crashing constantly, which was incredibly surprising, because of the specs of the machine I was working on. After about a day of trying to get it to work, I then turned to ZBrush for the sculpting which worked spectacularly. It was like reuniting with an old friend in a way, considering it's been almost a year to the day since I've used it last.


For sculpting reference, I used a number of diagrams of proposed pterosaur musculature as a loose guide. I also threw in my own knowledge of crocodylian musculature to help sculpt in the major muscle masses. A lot of the fine detail was influenced by birds, a few minor details from bats, and even some influence from lizards. I looked at a lot of pelicans, cormorants, parrots, and condors to try to get some nice face wrinkles. There's a lot of detailed skin texture which is kind of difficult to see on the wider images (click for larger view).


Now I need to work on getting the diffuse, displacement, and normal maps to properly transfer to Houdini so I can move on from texturing.
-Evan
Wednesday, August 3, 2011
Tupandactylus III
A lot of cool stuff going on with this guy. I've done the first round of blocking animation, and then moved on to some visual development. I've been working on lighting/shading/rendering as a break from animation. Primarily, I've been playing a lot with subsurface scattering. I set up the shot featuring this guy so that he will be lit extensively from behind. I want to do this so that I can play with the subsurface on the wing membranes, exposing tints of the subdermal layers and blood vessels underneath.
Here is a test image of the subsurface:

I was able to control the subsurface scattering through texture maps, where I painted in the veins and arteries that will subtly shine through the skin in certain areas:

Keep in mind the shading in the top image is from the subsurface alone. That's the tint that's going to shine through. There is just a plain brownish shader (with no displacement) applied to the model at this time. The reason for this is I had a lot of look-development to do in order to figure out what I want this guy to actually look like before texture painting can begin.
I did some visual development by painting over a black and white render of the Tupandactylus with the brush mode set to overlay. After doing a couple of concept paintings, I mixed and matched the various layers to get many more variations. I'm not yet sure which one I'm going to pick, but here are the concept paintings (click to enlarge):




Here is a test image of the subsurface:

I was able to control the subsurface scattering through texture maps, where I painted in the veins and arteries that will subtly shine through the skin in certain areas:

Keep in mind the shading in the top image is from the subsurface alone. That's the tint that's going to shine through. There is just a plain brownish shader (with no displacement) applied to the model at this time. The reason for this is I had a lot of look-development to do in order to figure out what I want this guy to actually look like before texture painting can begin.
I did some visual development by painting over a black and white render of the Tupandactylus with the brush mode set to overlay. After doing a couple of concept paintings, I mixed and matched the various layers to get many more variations. I'm not yet sure which one I'm going to pick, but here are the concept paintings (click to enlarge):


I looked at a lot of reference imagery of everything from parrots to frogs to butterflies. I often see a lot of pterosaur restorations with the exact color patterns of various types of birds. I wanted to avoid this trend, by attempting to find something that feels like it could have appeared in nature while also feeling unique to this type of animal. I was also trying to make sure the crest stands out as a display device, while also having the entire animal's color palette feel homogeneous.
Now that this has been done, I need to decide on a design, and get to painting. I think this next week I'm going to jump back to animation again, as well as hopefully get those pycnofibers started.
-Evan
Friday, July 22, 2011
Tupandactylus II
Continuing on my Tupandactylus, I fixed up the model, created some UV's, rigged, and skinned the critter. The key for the rig was making it so it would be able to work both in the air, and in the pterosaur quadrupedal stance. I think it works rather well.


Next I'm going to do some animation to test the rig further, and make any minor adjustments I may need in the skin weighting before I get to texturing and 'pycnofiber' generation (via the fur tools).
-Evan


Next I'm going to do some animation to test the rig further, and make any minor adjustments I may need in the skin weighting before I get to texturing and 'pycnofiber' generation (via the fur tools).
-Evan
Monday, July 11, 2011
Tupandactylus I
For an individual portfolio-building project at work, I've decided to build a full creature in Houdini; doing everything from modeling to animating to rendering. I've also taken this opportunity to do something I've wanted to do for quite some time: build a pterosaur. More specifically, the tapejarid, Tupandactylus imperator.
To prep, I've been doing a lot of reading about pterosaur anatomy; mostly Dr. David Unwin's Pterosaurs: from Deep Time, as well as from other sources such as http://pterosaur.net/ and portions of various papers and websites. Due to the lack of time I have to complete this, I'm obviously not going to hit the books nearly as hard as I did for my Master's Thesis. I just have been casually reading and using my modeling sessions as a way of testing my understanding. It's been fun so far. I want it to be authentic enough, and true to the animal without killing myself over every minor anatomical detail.
Here are some images of what I have thus far. So far I've completed the base model (much more detail will eventually be sculpted in), and I've laid out the bones which will be used for the control rig.
First the model:


...and the bone layout:

I took my time with the model to try to make sure I was able to create it in a way that would work for both the flying and walking motions. Being conscious of this, before spending the time in connecting the model to the bones, I first adjusted the skeleton into a quadrupedal stance to make sure the dimensions of the animal would work.


This has been a fun project so far, and I'm excited to get a working rig. Painting the skin texture and adding the "pycnofibres" should be fun as well :P
As always, comments, suggestions, feedback, etc. are welcome!
-Evan
To prep, I've been doing a lot of reading about pterosaur anatomy; mostly Dr. David Unwin's Pterosaurs: from Deep Time, as well as from other sources such as http://pterosaur.net/ and portions of various papers and websites. Due to the lack of time I have to complete this, I'm obviously not going to hit the books nearly as hard as I did for my Master's Thesis. I just have been casually reading and using my modeling sessions as a way of testing my understanding. It's been fun so far. I want it to be authentic enough, and true to the animal without killing myself over every minor anatomical detail.
Here are some images of what I have thus far. So far I've completed the base model (much more detail will eventually be sculpted in), and I've laid out the bones which will be used for the control rig.
First the model:


...and the bone layout:

I took my time with the model to try to make sure I was able to create it in a way that would work for both the flying and walking motions. Being conscious of this, before spending the time in connecting the model to the bones, I first adjusted the skeleton into a quadrupedal stance to make sure the dimensions of the animal would work.


This has been a fun project so far, and I'm excited to get a working rig. Painting the skin texture and adding the "pycnofibres" should be fun as well :P
As always, comments, suggestions, feedback, etc. are welcome!
-Evan
Subscribe to:
Posts (Atom)